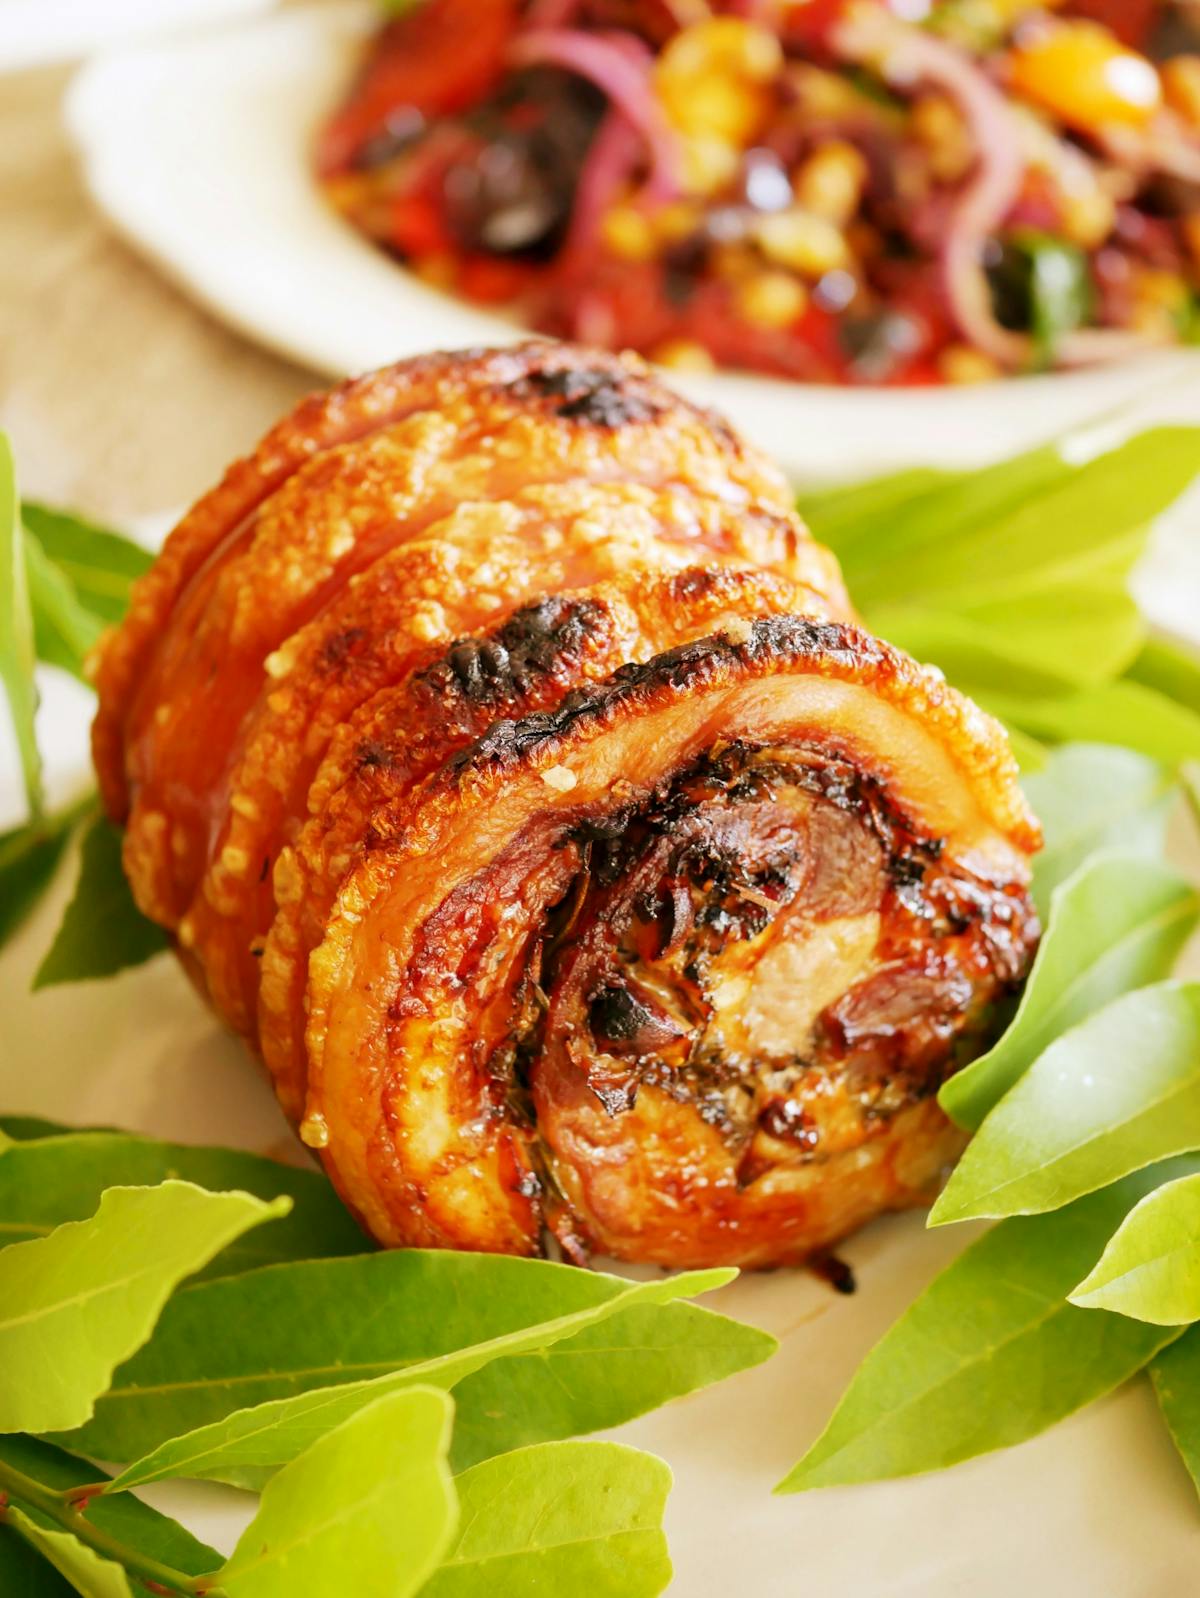
Back in my Kleenmaid days I used to make roast pork in the very clever Microwave Grill oven in about 30 minutes or less. I still have one of those ovens but by the Italian brand Fulgor, but I prefer to do my pork roast more slowly in the regular oven. If I was in a rush, I may still defer to the old microwave method, but in general, I make sure i have plenty of time to get the crackling just right. I mean, that is the point of roast pork to me. Perfect Crunchy Crackling and plenty of it.
Here are my best tips:
1. Make sure your roast is well scored. I like to ask the butcher to do this as there are not many household knives capable of giving skin the scoring you need. The more scoring (within reason) the better the lift on the crackling.
2. Boiling water. This sounds a bit weird, but it helps to separate the skin from the meat and begin the rendering fat process, which is essential to enjoy more crackle, less fat. So place your piece of pork into either the Varoma tray, or Varoma itself, or any other tray, and pour plenty of boiling water all over it. The score marks will magically appear and you should keep going until this happens.
3. Dry skin is crunchy crackling. Dry the whole thing well with a paper towel. You are about to wet it again, but not with water.
4. Oil, vinegar, salt, oil, vinegar, salt. Rub these over the fat, and into the score marks at least two times. Be generous, a lot of what you put on will not stay on during the cooking process. These 3 ingredients all help the pork to render and the crisping to happen.
5. IF YOU HAVE TIME. Place the pork uncovered into the fridge for 1 hour or more. This will help further dry out the skin and give you a better result.
6. Low heat for ages, followed by high heat at the end. Follow my instructions on cooking for this part. But cooking the pork on a low slow heat will render out all the fat, make the meat tender and juicy and then when you are ready some high heat at the end will help the crackling crackle!
7. Rest, then serve whilst still piping hot. I like to rest, again uncovered so the crackling stays crunchy, for around 10-15 minutes. Surprisingly the pork will retain its heat quite well. Remove the crackling and break into pieces. Slice the meat and serve ASAP with everything you love to have with it.
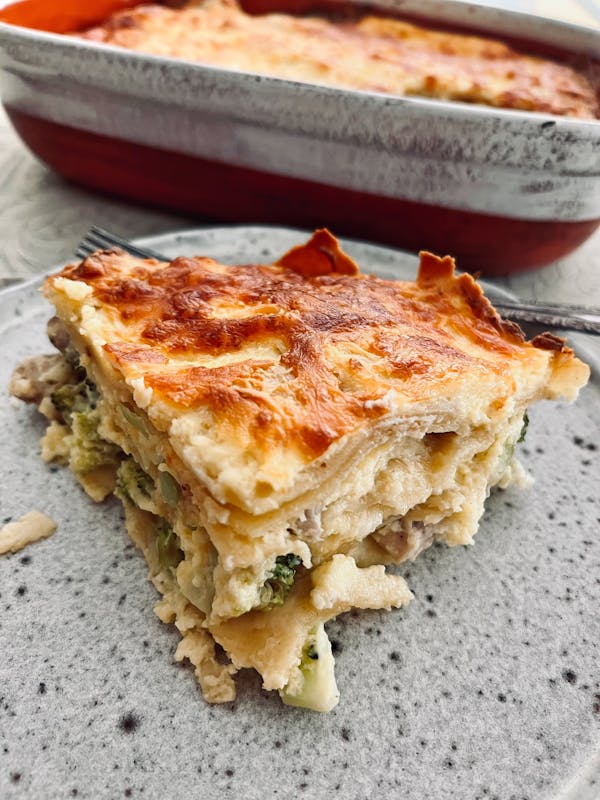
Broccoli and Cauliflower Gratin
Crunchy Roast Potatoes with Sage
to name a few ideas!
Enjoy!
If you enjoyed this recipe, we invite you to come join our FREE TRIAL on the Insider Club to have extra Thermomixery each and every month! #recipesthatwork #youcandoit
Are you on Instagram, Facebook, Pinterest? Never miss another thing in the test kitchen when you follow us.
Please join our mailing list HERE to have recipe updates delivered to your inbox weekly and don't forget we are on YouTube.
Our newest course, (FREE to Insiders) Shelf Control helps you sort out your pantry and fridge!
We have an amazing Lazy Sourdough Bakery course available to do at your own pace online.
Our delicious frosty course, The Whole Scoop Ice Cream course is churning now!
Need
- Between 2-5 Kilos pork rolled roast
- plenty of Boiling water
- Extra Virgin Olive Oil (EVOO) as needed BUY
- apple cider vinegar as needed
- pink salt flakes as needed BUY
- liquid stock as needed
- white wine as needed (optional)
Do
- 1
Rinse pork roast.
- 2
Make sure rind is scored well. (You can ask your butcher to do this.)
- 3
Pour boiling water over, pat dry. (This process should lift the rind off the meat and help it to crisp.)
- 4
Rub oil, vinegar and salt to taste into the rind and scoring. Repeat at least twice.
- 5
Place the roast into the dish you plan on cooking it in and leave uncovered in the fridge for up to 2 hours if possible.
- 6
Preheat fan forced oven to 150°C and set a rack on the lowest rung of the oven.
- 7
When ready to roast, pour enough liquid stock around the pork, carefully avoiding pouring any liquid onto the skin, to just reach the fat line of the meat. Add some white wine to this liquid if you wish, again not coming up past the fat line. The amount of these ingredients you need will vary and depend on the size of the roast as well as the size of the pan you roast it in. (Closer fitting pan is better.)
- 8
Place into the oven on the bottom rack and cook for approximately 90 minutes, but do keep an eye on it, topping up liquid occasionally as needed.
- 9
Change the oven setting to a grill function on 200°C, leaving the roast on the bottom rack. Watch it carefully. It can go from perfect to black in a matter of minutes. When you are happy with the look of the crackling, remove and rest as instructed before serving hot with accompanying dishes.