Traditional Honey Cake

Crazy delicious honey cake has been on our to do list for years. Finally, here it is! Not difficult, but definitely needs some love on the day.
I'm not going to lie. Bree made the whole thing. Not without some consultation, and we did re-write this a couple of times to make it crystal clear for you dear baker. Please give it a go, if this has been on your to do list as it has been on ours, then try this version. We LOVED it.
It is not easy...it is even fiddly to a degree, but we have tried to make it as simple as it can be. Give it some love the first time you make it, and I promise you, like the Vanilla Thriller Slice and the Pink Peppermint Triple Layer Mud Cake it will get easier every time you make it.
It was highly regarded at a recent dinner party. I served it with some Hokey Pokey Ice Cream (with homemade honeycomb...just to really take it to the next level!)
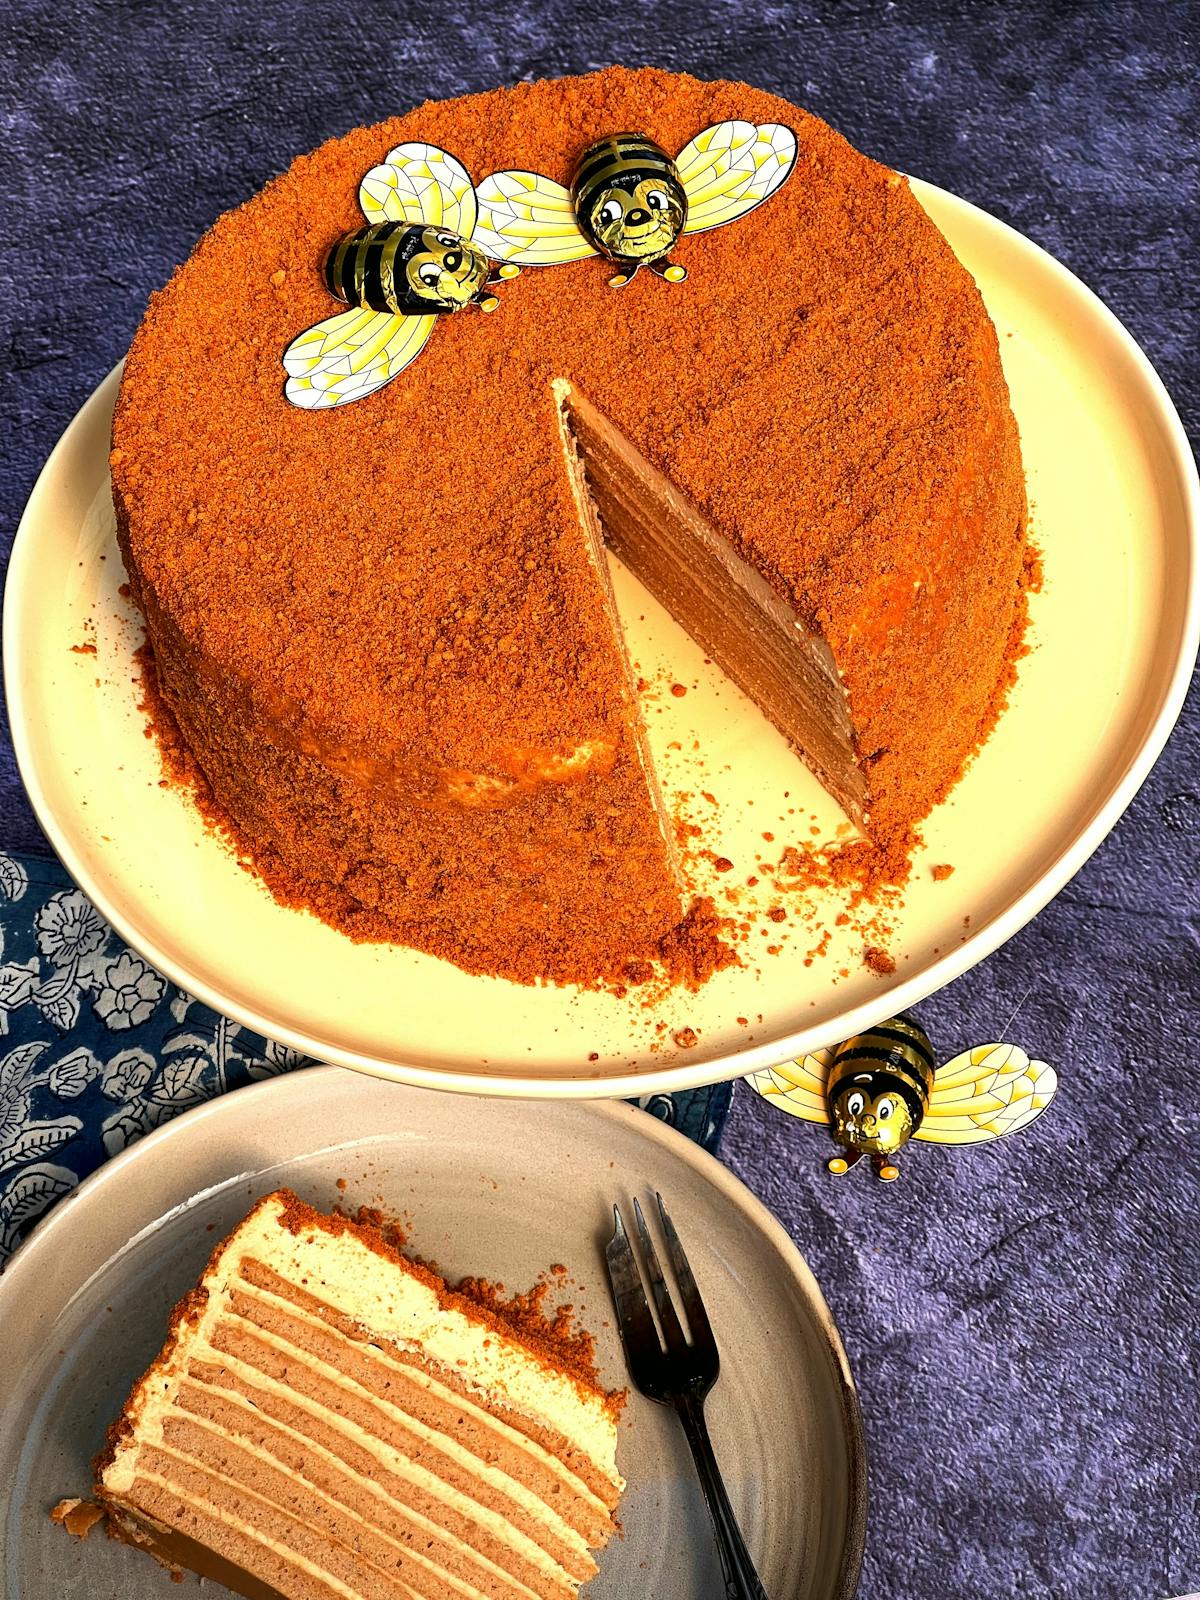
We are serving this, (not demonstrating) at the Honey Around the World cooking class for Australian Honey month this May. I have to say, those bees did an awesome job, as did Bree. Please bake and post pics. I really want to see this one in action!

Need
-
The Burnt Honey
- 340 Grams honey
- 1/4 Cup water
-
The Cake
- 70 Grams Burnt Honey (above)
- 220 Grams honey additional
- 220 Grams raw caster sugar BUY
- 200 Grams butter cubed BUY
- 6 eggs
- 2 1/2 Teaspoons baking soda
- 2 Teaspoons pink salt flakes BUY
- 1 Teaspoon ground cinnamon
- 450 Grams bakers or strong flour sifted
-
The Filling
- 1130 Grams cream BUY
- remaining Burnt Honey
- 1 Tin Condensed Milk Dulce de Leche or commercial 'top n fill' Recipe
- 1 Teaspoon pink salt flakes BUY
Do
- 1
Preheat oven to 170°C. Grease and line large baking trays. The largest you have that will fit into your oven.
- 2
You will need a tin as a guideline for cutting the cake layers. The first time we did this we used a round 21cm round cake tin, but the second time we used a square tin. You can go either way.
- 3
To make the Burnt Honey, set a medium saucepan over a high heat. Add honey. Stir occasionally until honey starts to foam and turn into a deep caramel colour. Add water carefully and whisk. Set aside.
- 4
To make the cake, place 70g Burnt Honey, honey, sugar and butter into the Thermomix bowl. Warm 4 min/50°C/speed 3 until butter has melted. Whisk 2 min/50°C/Butterfly/speed 2.
- 5
Add eggs, one at a time, while whipping 30 sec/Butterfly/speed 3.
- 6
Add baking soda, salt and cinnamon. Mix 1 min/Butterfly/speed 3.
- 7
Add a third of the flour and combine, 8 sec/Butterfly/speed 3. Repeat with second third. Add remaining flour and combine, 5 sec/Butterfly/speed 3. Finish combining with spatula if needed.
- 8
Spread batter as thinly and evenly as you can on prepared trays. You want to only just cover the bottom of the tray. Bake each tray for 4-5 minutes or until cake bounces back when touched. Cool. Reduce oven temperature to 150°C.
- 9
Cut out 8 (at least) desired sized circles or squares from the thin cake layers. We got 8 x 8" (21cm) circles out of our very large trays. Keep all the excess cake to make the crumb.
- 10
Return all excess pieces of cake to a lined tray and bake for 15 minutes until crispy and full dry. Set aside to cool. Place in Thermomix bowl and mill 10 sec/speed 7 or until it resembles a crumb. Set aside.
- 11
To make the filling, place the remaining burnt honey, dulce de leche, salt and 130g of cream into the Thermomix bowl. Combine 10 sec/Butterfly/speed 3. Place the entire Thermomix bowl into the fridge and chill completely. Scrape into another container.
- 12
Without washing the bowl, place 500g of cream into the Thermomix bowl. Whip 20 sec/Butterfly/speed 4 or until you have soft peaks. Add half of the reserved honey mixture and whip Butterfly/speed 4 until you have firm peaks. Scrape into another bowl.
- 13
Repeat with remaining cream and honey mixture. (This repeated step is due to the volume of the filling).
- 14
Assemble the cake on a flat serving plate. Start with a cake layer, top with filling, spread to the edges. Place next cake layer and continue until you've used up all cake layers.
- 15
Frost top and sides of cake and then press cake crumb all over. Refrigerate over night. Serve chilled.
- 16
This cake is best after a couple days.


Bree is a mum who has always loved cooking and baking and became a big Tenina fan when she got her first Thermomix. She was on the very first foodie trip as a customer and hasn't looked back, working for Tenina for over 5 years as a recipe tester and developer, branching out into video master for all of Tenina's lives! She still runs her baking business, creating amazing cakes and macarons for her customer list.


