Victoria Sponge Cake
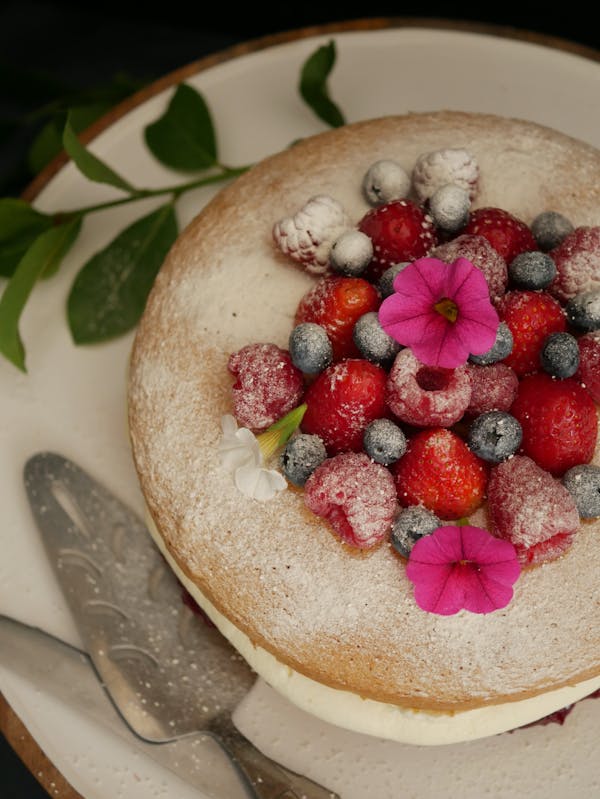
This is not your nanna's sponge cake, especially when you get your edible flowers thing happening. SO pretty, so easy. DO IT!
Not your Nannas Victoria Sponge Cake
Apparently you can make this using a commercial gluten free flour with success. I haven't tried it yet, but by all means, let me know! One of our Insiders made it and loved it and will always be doing it that way! Fantastic!
Gluten free flour is lighter and fluffier than flour with gluten, so the sponge should be a rip roaring light and airy winner!
Cue the homemade jam and whipped cream...then of course the obligatory dusting of icing sugar and those berries...not forgetting the flowers, which I have taken to growing as they are so impossible to source in Perth. (I am in Melbs writing this up now and have seen edible flowers in packs EVERYWHERE!!) Come on Perth, time to get this one sorted...though growing them is quite therapeutic as well!
So afternoon tea is sorted, I cannot wait to see this pop up on Instagram. Don't forget to tag me! Happy Baking!
Here are some of our other stellar cake recipes to take a look at:

Need
-
The Cake
- 1 Classic Sponge Cake baked and cooled Recipe
-
The Rest
- Raspberry Jam or other jam as needed Recipe
- 600 Milliliters cream BUY
- 3 Teaspoons raw caster sugar BUY
- 2 Teaspoons vanilla bean paste BUY
- 250 Grams fresh berries of choice
- Ten Times sugar (icing sugar) as needed Recipe
- edible flowers to garnish
- tiny mint leaves to garnish
Do
- 1
Bake the cake as instructed and allow to cool completely before assembling. You can actually pre-make the cake well in advance and either freeze for up to a month or keep tightly wrapped and in the fridge for up to 3 days.
- 2
Prepare the jam well in advance. It needs to be cold and set for best results.
- 3
When you are ready to assemble and serve, place the cream, sugar and vanilla into the Thermomix bowl and whip 10-20 sec/Butterfly/speed 4 or until stiff peaks have formed. Under whipped is preferred to over whipped.
- 4
Place a little dob of whipped cream onto the base of the serving plate you will use. Place the cake, top side up on top of the cream to stick it in place. Cut the cake in half as video directs.
- 5
Spread the base half of the cake liberally with jam. Top with the whipped cream in the centre of the jam.
- 6
Place the other half of the cake on top with the cut side down. Place a little bit of cream on top of the cake to 'glue' the berries to the cake. Starting with the largest berries you have selected, decorate the cake until you are satisfied. (Every slice needs plenty of berries, just to keep world peace!)
- 7
Dust with plenty of icing sugar, then finish off with the edible flowers and mint leaves.
Served with

Tenina Holder is a wife, mother of five and grandmother of eight, who started cooking in the olden days before Thermomix was even a thing.
Tenina has become the premium go to source for all Thermomix expertise and of course fresh and easy recipes that work. Her cooking classes and foodie trips are sold out in literally hours, her cookbooks appear on the Australian best seller lists and her social reach is in the millions. Her Insider Club is the most fun you can have with a Thermomix and you really should join her! She believes chocolate, butter and salt are health foods. Her food positivity mantra is, eat everything, just not all at once!


