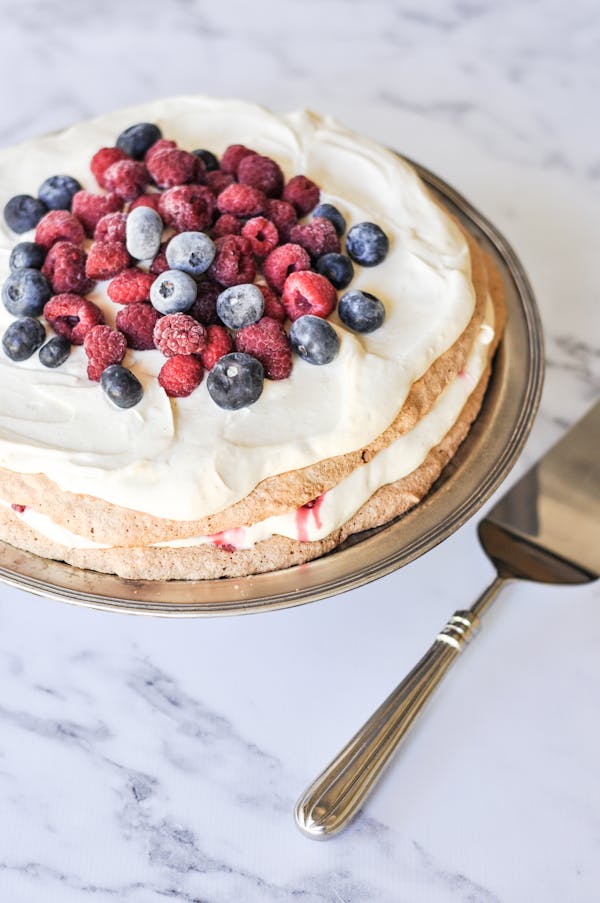
Almond Dacquoise with Lemon Cream & Berries
A little bit fancy, very delicious and super easy to make. Think nutty pavlova, too easy!
I do love a nutty meringue or dacquoise. (Pronounced da-kwaz.) It always sounds better in French; am I right? Add lemon cream and berries and you have a seriously amazing dessert. There will be no complaints…and it’s gluten free. If that matters to you.
Serve me up a slice!

Need
- 1 whole vanilla bean BUY
- 300 Grams blanched almonds
- 230 Grams egg whites
- 300 Grams raw caster sugar BUY
- 2 Tablespoons cornflour or cornstarch
-
Filling;
- 600 Milliliters cream BUY
- 2 Teaspoons vanilla bean paste BUY
- 150–200 Grams Lemon Butter Recipe
- 300–400 Grams berries of choice
Do
- 1
Toast vanilla bean and almonds on flat oven tray for 10 minutes by placing into a cold oven set to 200ºC. Set aside to cool. Reduce oven temperature to 140ºC.
- 2
Draw two 16cm circles onto baking paper and place onto flat trays. Set aside.
- 3
Place roasted vanilla bean and almonds into the Thermomix bowl and mill 10 sec/speed 10. Remove from bowl and set aside. Clean and dry the Thermomix bowl thoroughly.
- 4
Place egg whites into the Thermomix bowl and beat 5 min/37ºC/Butterfly/speed 3.
- 5
Beat 4 min/60°C/Butterfly/speed 3/MC off adding sugar and cornflour through the hole in lid a little at a time.
- 6
Beat 20 min/Butterfly/speed 1/MC off.
- 7
Remove Butterfly. Add milled nuts to the Thermomix bowl and incorporate by hand with a spatula.
- 8
Divide mixture between circles on prepared trays.
- 9
Bake for 45 minutes. Cool slightly before lifting dacquoise off the paper with a large flat spatula. Cool completely on wire rack.
- 10
When ready to assemble, place cream and vanilla bean paste into the clean, dry Thermomix bowl and whip 20–40 sec/Butterfly/speed 4 or until soft peaks form.
- 11
Remove Butterfly. Add Lemon Curd and fold through using spatula.
- 12
Place first dacquoise layer onto serving platter and top with lemon cream, bringing it almost to the edges. Spread a few sliced berries across the cream.
- 13
Place second dacquoise on top and finish off with more cream. Garnish with plenty of berries.
- 14
Serve within a few hours, as the dacquoise layers will soften up considerably once the cake is assembled though I quite like that. .

Tenina Holder is a wife, mother of five and grandmother of eight, who started cooking in the olden days before Thermomix was even a thing.
Tenina has become the premium go to source for all Thermomix expertise and of course fresh and easy recipes that work. Her cooking classes and foodie trips are sold out in literally hours, her cookbooks appear on the Australian best seller lists and her social reach is in the millions. Her Insider Club is the most fun you can have with a Thermomix and you really should join her! She believes chocolate, butter and salt are health foods. Her food positivity mantra is, eat everything, just not all at once!


