Honey No Bake Pavlovas

The perfect summertime dessert downunder. No baking required, no sugar, and plenty of flavour without overt sweetness. Feel better with honey!
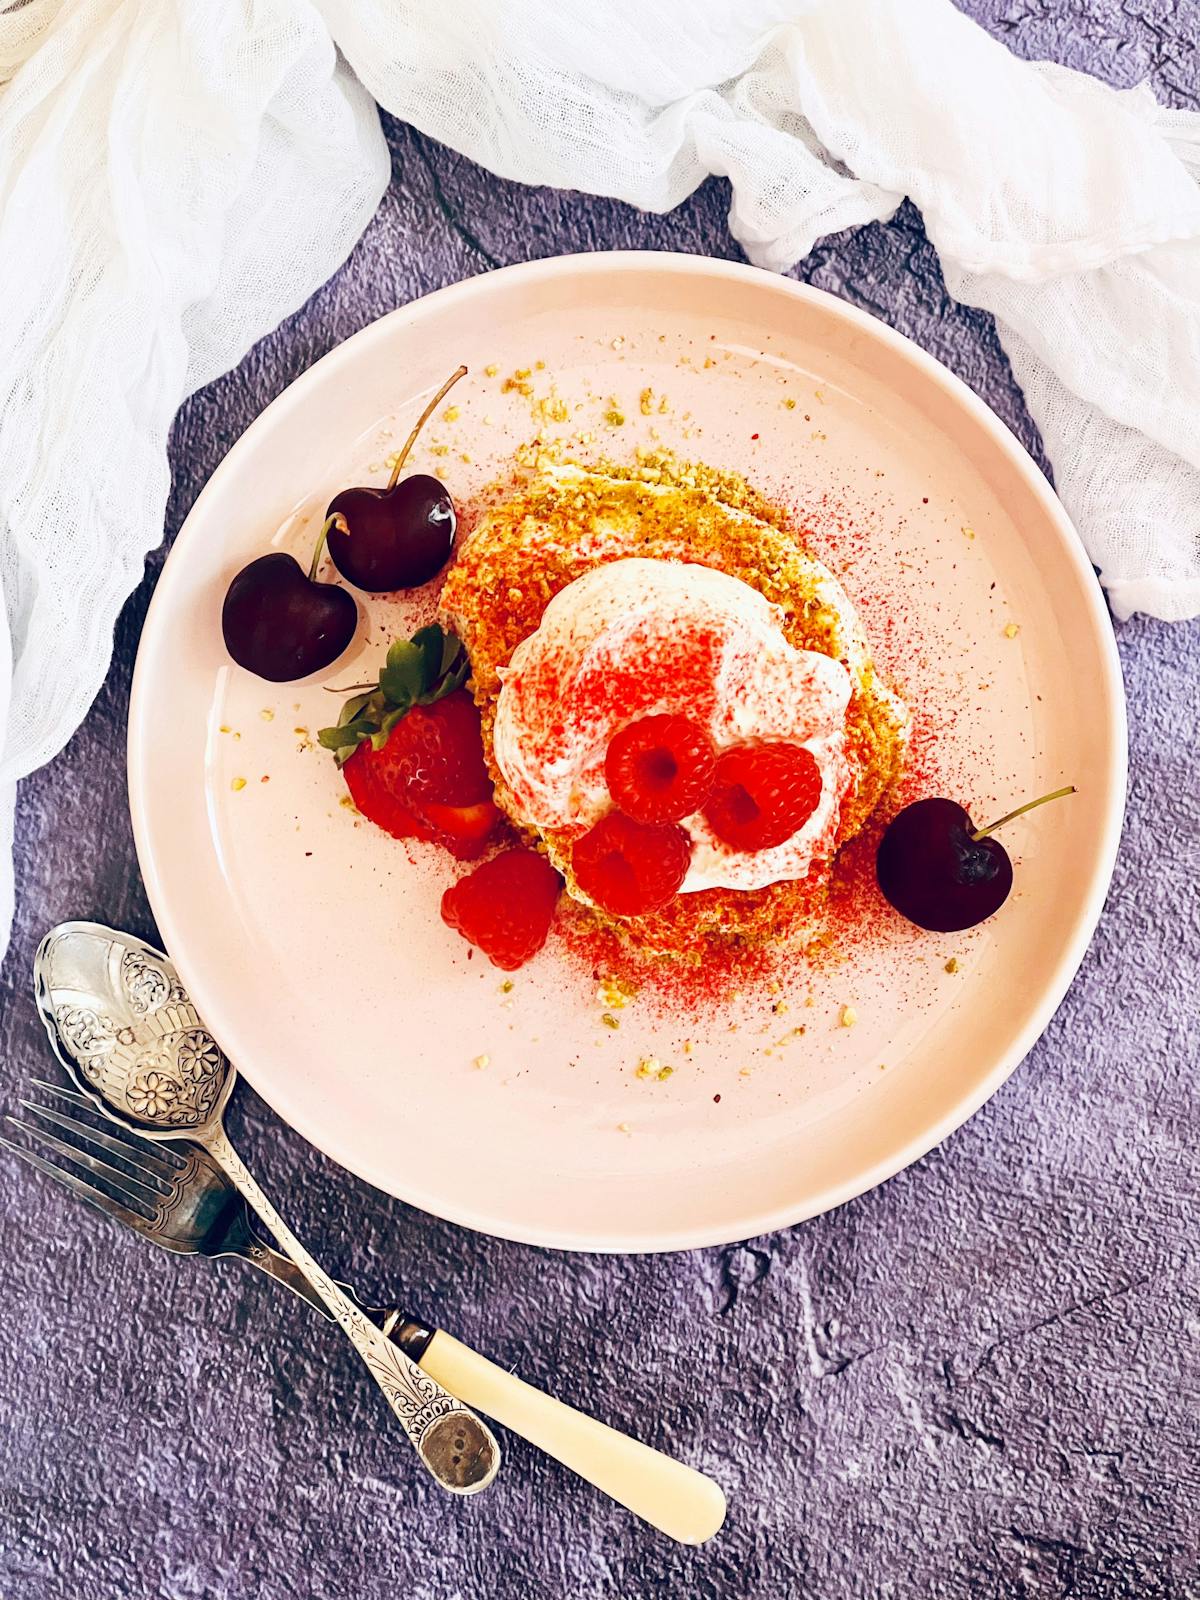
We love our honey in this household so tis a no brainer to turn it into this amazing pavlova. Of course, pavlovas are normally baked, albeit at a low heat, but the rules for a high TA rated honey are no heat. So we decided to go ahead with a no bake version, and to be honest, it is amazing. You get all of the honey flavour, it isn't too sweet given that the topping is mostly yoghurt, and it is ultra pretty with the raspberry dust. You can go the whole traditional topping route of course, but we thought we would try something a little different and it worked wonderfully.
Merry Mixing, stay cool my lovelies, and enjoy that amazing honey goodness.
Make sure you check out some of our other amazing honey recipes:

Need
-
The Pavs
- 200 Grams egg whites
- 1 Teaspoon cream of tartar
- 340 Grams honey (runny honey)
- 3 Tablespoons flavourless gelatin
- 200 Grams warm tap water, not boiling
- 1 Teaspoon vanilla bean paste BUY
-
The Rest
- 50-60 Grams pistachios
- 100 Grams cream BUY
- 200 Grams pot set yoghurt or Greek yoghurt Recipe
- 2 Teaspoons honey
- freeze dried raspberry powder (optional)
- summer fruits of choice
Do
- 1
Line a large baking tray with paper and set aside.
- 2
Place egg whites and cream of tartar into the Thermomix bowl and whip 5 min/butterfly/37°C/speed 3/MC off.
- 3
Make sure your honey is runny. It needs to drizzle into the meringue. You can warm it up a little in a bowl of warm water until it is pourable.
- 4
Drizzle the honey through the hole in the lid as you whip 6 min/butterfly/60°C/speed 3. Take the full amount of time to add the honey.
- 5
Chill the entire mixture in the fridge until it is completely cooled. (Leave the butterfly in place.) This may take up to an hour.
- 6
Bloom the gelatin in the water, making sure there are no lumps. Add to the Thermomix bowl with the vanilla bean paste.
- 7
Whip 30 min/butterfly/speed 3/MC off until it is starting to thicken and increases in volume.
- 8
Dollop mounds of the mixture onto the prepared tray and stir into round mini pavs with a spoon. Try not to deflate the mixture too much.
- 9
Place the pistachios into a clean, dry Thermomix bowl and chop 10 sec/speed 8 until fine. Sprinkle onto the pavlovas while still sticky. If you wish to save money, almonds or hazelnuts will also work well for this. Allow these to set in the fridge until quite firm.
- 10
Add the cream, yoghurt and remaining honey to the Thermomix bowl and whip 10-20 sec/butterfly/speed 4 or until you have soft peaks. Refrigerate this mixture until it is firm and well chilled.
- 11
When ready to serve, place a spoonful of the yoghurt mixture into the centre of each serving plate. Top with a mini pav and then divide the remaining yoghurt mixture between the pavlovas.
- 12
Dust with the raspberry powder and sprinkle with additional chopped pistachios if you wish.
- 13
Serve with fruit of choice.

Tenina Holder is a wife, mother of five and grandmother of eight, who started cooking in the olden days before Thermomix was even a thing.
Tenina has become the premium go to source for all Thermomix expertise and of course fresh and easy recipes that work. Her cooking classes and foodie trips are sold out in literally hours, her cookbooks appear on the Australian best seller lists and her social reach is in the millions. Her Insider Club is the most fun you can have with a Thermomix and you really should join her! She believes chocolate, butter and salt are health foods. Her food positivity mantra is, eat everything, just not all at once!


