Sourdough Kvass Pro-Biotic Soda or Beer


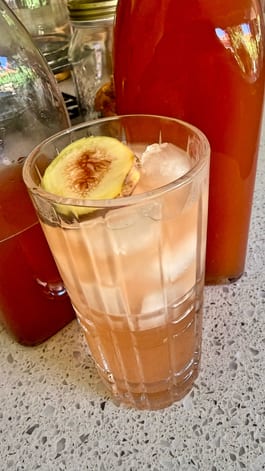
A naturally fizzy, probiotic-rich drink made from sourdough bread — easy, healthy, and incredibly refreshing.
Sourdough bread kvass is a traditional fermented drink with the benefits of zero-waste. Made from leftover sourdough crusts or stale slices, it transforms what might otherwise be discarded into a lightly tangy, naturally fizzy, probiotic-rich beverage that supports gut health and digestion. I keep my crusts or stale sourdough in the freezer in one bag, and once we reach the optimum level for some kvass, we are in the fizzy bizzy!
Kvass is as nourishing as it is practical, a smart way to reduce food waste while introducing more beneficial bacteria and enzymes into your diet. With just a handful of ingredients and a bit of time, you’ll have a refreshing, sustainable drink that’s perfect for sipping daily. Ideal for fermentation beginners or seasoned gut health enthusiasts, this is one pantry-friendly tonic you’ll come back to again and again.
Health Benefits of Sourdough Kvass:
Kvass made from sourdough bread is a natural source of probiotics, which can help balance the gut microbiome and support digestion, immunity, and even mood regulation. Fermented foods like kvass are rich in enzymes that assist with nutrient absorption, and the mild acidity of kvass can also help maintain optimal pH levels in the gut. Additionally, because this version uses sourdough bread, you also benefit from the slow-fermented grain's improved digestibility and bioavailable nutrients like B vitamins, iron, and magnesium. It's a nourishing, revitalising beverage that hydrates while it heals.
Serving Ideas for Sourdough Kvass:
Chill and enjoy as a refreshing drink on a hot day
Add a splash of lemon or orange juice before serving for a citrusy twist
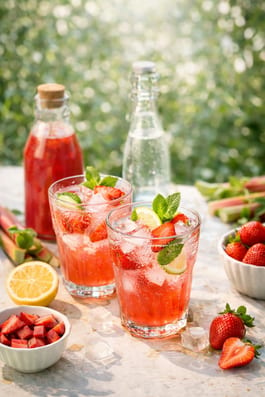
Mix with sparkling water and mint for a homemade fermented soda
Use as a base for savoury cold soups like okroshka
Sip before meals to support digestion
Add a dash of ginger or berries during fermentation for flavour variation
Serve in small glasses as a gut-friendly aperitif

Need
- 4-6 Slices Lazy Sourdough loaf very stale or toasted Recipe
- 120 Grams raw sugar
- a few raisins
- approx 2 Litres filtered water or more to cover the bread if you have room in your container
- 2 Teaspoons Sourdough Starter Recipe
Do
- 1
Either use stale bread or toast the bread before cutting into large cubes.
- 2
Place into a large sterilised jar with the remaining ingredients. Give it a good stir.
- 3
Loosely cover with paper or paper towel, or even a piece of cheesecloth and secure with an elastic band. Sit on the bench out of direct light for 2-3 days before checking the flavours and fizziness.
- 4
Initial Fermentation:
- 5
After toasting the bread, soaking it in water, and adding a starter (like sourdough starter), the mixture will begin to ferment.
- 6
Visible Signs:
- 7
Within 2-3 days, you should see bubbling and movement in the liquid, especially if kept at a warm room temperature. The bread will also likely shrink in volume.
- 8
Taste Test:
- 9
Begin tasting the kvass after 3 days. The taste will change as the fermentation progresses, becoming more sour and less sweet.
- 10
Monitoring:
- 11
You can stir the mixture once a day and burp any pressure that builds up, especially if using a sealed container.
- 12
Ready for Strain and Bottle:
- 13
Once the kvass reaches your preferred level of tartness, you can strain out the bread solids and bottle it, optionally adding raisins for further carbonation.
- 14
Re-Fermentation (Bottling):
- 15
After the initial fermentation, the kvass is bottled, often with additional raisins or other flavourings.
- 16
The bottled kvass is usually kept at room temperature for a day or two, and then chilled in the refrigerator.
- 17
The longer it ferments in the bottle, the more carbonated it will become, and the more alcohol it will develop (though still usually low, around 0.5-2%).
- 18
Burping:
- 19
During both the initial and secondary fermentation, it's important to burp the bottles (release excess CO2) to prevent explosions, especially when using glass bottles.
- 20
Safety:
- 21
Plastic bottles are often preferred for secondary fermentation due to safety reasons, as they allow you to gauge the pressure build-up.
- 22
Flavour:
- 23
The longer the fermentation, the more the flavour will develop, potentially becoming more sour and yeasty.
- 24
Add fresh mint, sliced apple, berries, raisins, or even lemon peel to change it up.
More
It will be ready to drink after 3 days in the fridge. However, it will continue to ferment for another 1-2 weeks until all the sugars have been consumed by the yeast. At that point, it will no longer be sweet and it will have developed some alcohol content. I recommend drinking it within the first 3 to 7 days for the best flavour. Having said that, we made it in August 2025 and as of January 2026 we are still drinking it, and I may even like it more than I first thought!
Served with
This recipe can be seen if you sign up for the related course. Join the course to get access!
Gut Instinct Protocol: The Power of Fermented and Cultured Foods

Tenina Holder is a wife, mother of five and grandmother of nine, who started cooking in the olden days before Thermomix was even a thing.
Tenina has become the premium go to source for all Thermomix expertise and of course fresh and easy recipes that work. Her cooking classes and foodie trips are sold out in literally hours, her cookbooks appear on the Australian best seller lists and her social reach is in the millions. Her Insider Club is the most fun you can have with a Thermomix and you really should join her! She believes chocolate, butter and salt are health foods. Her food positivity mantra is, eat everything, just not all at once!